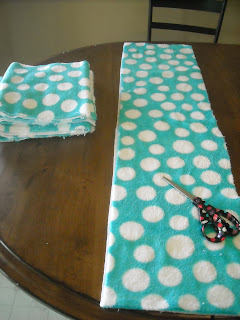
*Fabric-At least 1 1/2 yrds of fabric of 2 different (front/back) colors or 3 yrds of the same fabric to keep it simple.
I used a really soft turquoise polka dot blend found in the minky/fleece section of Joann's, and a plain white flannel.
 *Ribbon- 24ft (8 yrds) I recommend buying ribbon instead of sewing fabric pieces for the ties, just to keep it simple.
I used (2) Offray ribbons sold by the spool 1 1/2"x12ft Turquoise (with some left over), and I used 1 Offray ribbon 7/8"x18ft White (with some left over).
*Matching thread. I used white.
*Batting to stuff inside. Use left-overs you may have, or buy the smallest bag you can find, you won't need much.
(I honestly didn't want mine too thick and puffy so I used some that I had lying around as left-overs.)
A little scoop before I begin. I have never made crib bumpers before this. Sure I know how to sew a few different things, but I tried to find another DIY blog and they were all so complicated! I thought, there has to be an easier way.. so this is what I came up with. I pretty much made it up as I went and they turned out super cute and any level of sewer can make these. Seriously.
Step 1- Measure your crib and or crib mattress. And cut fabric. Mine was roughly 26x52x26x52inches (156" total) and I only wanted my bumpers to end up being about 10 inches tall. (**I have heard recently that crib bumpers can cause suffocation and other scary things for babies, so I didn't want mine to be too big or dangerous to my baby.**)
 Since my fabrics weren't the same sizes I used the smaller (flannel) as my guide of how much to cut. I'd need 4 strips cut to get close to my 156 total needed. You'll have to do your own math but it isn't too hard. *TIP*If you lay the right sides together and cut one of each material at the same time they will be ready to sew instead of having to flip the material around (or match up later).
Step 2- Sew your strips together and test fit in the crib. You should have 8 pieces of fabric cut, 4 of each material. Sew 3 sides with the right sides facing each other, leaving one of the smaller sides as your opening to stuff the batting in.
Step 3- Turn right side out, stuff batting, sew pockets and sew closed. I made each bumper have 4 equal pockets, I stuffed a small amount of batting in then sewed a straight line to prevent that batting from moving around too much or getting out. Repeat for each pocket.
Then either close or if you'd prefer to have one long bumper all connected, or 2 bumpers then leave open and sew together the other strips at the same time. I wish I would have sewn mine together into 2 big bumpers instead of 4, but it works either way.

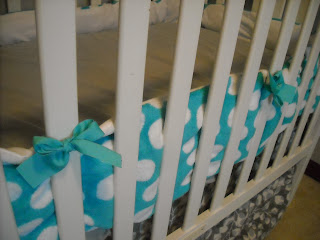
Step 4- Sew on ribbon. I cut my ribbon pieces 11in. burned the edges so they wouldn't fray and sewed them on the white side. Zig zag stitch forward and back-stitched 3 times to make sure they would stay put. I did blue on top and a few white ones in the corners of the crib to keep it pulled down.
The finished product!
These were simple and easy to make, I'd make them again anytime. If you have any questions on how I made them feel free to comment or email me at smalltowjulia@gmail.com. Good luck and I hope this helps!


